Polished

I’m headed over the bridge tomorrow to visit a fellow who goes by the name scout_guru on Instagram. He’s got a shop at his house and for the last ten years he’s worked exclusively on Scouts, and I’ve wanted to stop by and visit since before the pandemic. We’ve talked on the phone several times and he couldn’t be a nicer guy; I’m looking forward to the trip and to shooting the breeze with him.

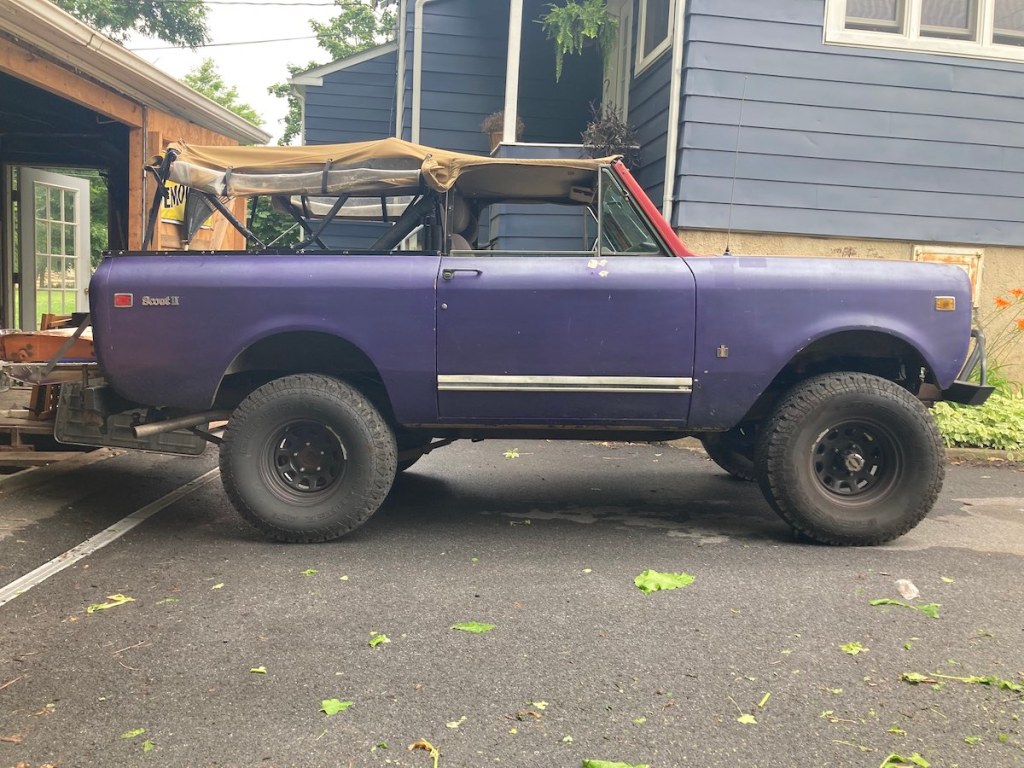
I was smoking meat in the backyard yesterday and as a result I couldn’t venture far. So naturally I did some small Scout stuff. The big project was to finish moving snaps on the snap rail, and to bust out the plastic polish to see if I could clean up the windows on the tan top. After about an hour of washing, polishing, washing and polishing, I got all three windows looking pretty good! It’s much easier to see out of all three of them now, and the top snaps in place much better.

I vacuumed out the dust, reorganized some tools, and threw Brian’s ammo can in the back to bring to him tomorrow when we meet up. The oil is full and looks clean, and we’ve got sunny weather forecast for the day, so I’m optimistic.

Posted on   |     |   Leave a Comment on Polished  |  Posted in Progress

Results

Here’s the first real test of the heat matting I’ve done on a day measuring 92˚ (102˚ with humidity) and after a five-mile ride into and back out of town: the heat matting is averaging around 100˚ along the trans tunnel and up the firewall, while the bare metal is around 115˚at every point. I’d call that a success!

Posted on   |     |   Leave a Comment on Results  |  Posted in Progress

Heat Matting

Yesterday, July 4, was a beautiful day. The weather was in the mid 80’s, the humidity was low, and I was exhausted from a very small parade party we hosted, where I drank more than my usual amount of beer and saw more than my usual amount of people. I was prepared to sit on the couch and play The Division 2 all afternoon but realized a perfect opportunity was escaping me, so I went out and started cutting heat matting down on the Scout.

First I put a section on the inside of the passenger door, which has always sounded like a dumpster being dropped off a bridge when it closes. I’m a pro at breaking down Scout doors so this took little time, and after I’d wiped the interior down with acetone the heat matting went on very quickly.

Then I started working on the driver’s firewall in sections. It took some time and some trimming, but I got the main section of the vertical rise done all the way down to the high beam switch over to the rise under the gas pedal.

On Monday I got back at it, beginning with the passenger’s side. First I ripped out all the vestigial IH padding I could reach and first washed the firewall, then rubbed it down with acetone before spraying the rusty areas with Eastwood encapsulator. It looks like the welds going up the side are a little crusty, and I think there’s probably more where the windshield meets the firewall—but that’s for another day.

While I was in there I pulled the passenger vent out, cleaned it up, sprayed the backside with encapsulator, and left it to cure.

While that was drying I unscrewed the transfer case knob and pulled the trans tunnel cover off, giving it the same treatment: a scrub with some Simple Green, a rubdown with acetone, and drying in the sun.

Then I used the outline of the case to cut a section of mat and applied it to the underside of the cover, cutting out the holes with a sharp boxcutter. It’s always looked like shit—it’s not the standard International green they used on base-model trucks but some kind of baby-poop brown, so I sprayed it with black paint and let it cure.

Back in the truck I started cutting sections of mat out and matching them to the geometry, working from the outside inward. It all went pretty smoothly, and when I’d covered the front section I was faced with the side of the trans tunnel. Should I cover it? Looking inside the trans tunnel, I saw that the previous owner had carefully undercoated as much of the underside as possible, which meant I wouldn’t be able to get the matting to stick under there. I decided that comfort outweighed aesthetics for the time being and cut a section for the interior to keep passengers from burning their legs.

And, because I didn’t really want to burn my legs, I put a matching section on the driver’s side. Finally, I cut a section for the area over the top of the tunnel, and put the remainder of the matting away.

Replacing the trans cover was a great moment, because after I’d washed the shift boots and put new stainless screws in, the cabin of the truck looked completely different.

It’s good to have that done, and I’m hoping it’ll make a big difference when it comes time to drive to Ohio. I don’t know how I’m going to hide all of the foil, but I’m hopeful it will beat back the heat.


Posted on   |     |   1 Comment on Heat Matting  |  Posted in Progress

Tuesday Tinkering

After much hemming and hawing I busted out a drill and an angle grinder and set up the ammo can the way I’ve been planning since last year. Ultimately I went with my first plan, which was to bolt the tongue of the hasp to the bottom of the can and bolt the staple to the bed of the truck. This went pretty smoothly. I cut the hinge off the hasp, drilled holes in it and the can, and bolted them together after trimming the bolts to size. Then I cut a piece of steel down to boost the height of the staple and bolted that into the bed. All the bare metal got cleaned with acetone, etch primed, and painted with flat camouflage green, and tomorrow I’ll drop the can in place. All it needs then is a second lock for the bed of the truck.

I did also get a roll of heat matting in the mail last week, and I’m looking at how and when I can install some on the firewall. Poking around in front of the seats this evening, the factory insulation looked pretty good on the passenger side and terrible on the driver’s side—so I tore it out in front of the pedals.

I think the key to adding this stuff is going to be sanding the rusty spots down, hitting them with encapsulator, then cleaning the surfaces as much as possible with acetone or some other degreaser.

There are a lot of mechanical bits on the driver’s side that need to stay uncovered so I’ll have to work around those. I think the plan will be to prep the areas as mentioned above and then use some heavy paper or cardboard to template out the matting. It says all over the box “VERY STICKY” and it would be my luck to get it stuck to the brake pedal or something.

I’m first going to cut a section and do a test run on the passenger’s door first so I know what I’m dealing with. Closing that door sounds like dropping a frying pan onto a dumpster, so having the matting help with vibration will be great.

Posted on   |     |   Leave a Comment on Tuesday Tinkering  |  Posted in Progress

Updates and Small Projects

There hasn’t been much going on with the Scout, other than trips around town. Frankly, we don’t get out much, so anytime I have to use a car I take the Scout. She starts right up and is always ready to go, and for that I’m thankful.

I’ve been slowly futzing with the ammo can toward the eventual goal of getting it permanently installed this summer. Where we left off was engineering a way to secure a hasp to the bottom of the can in the least obtrusive way possible. I’ve been thinking I’d drill and bolt it to the bottom to have the hasp stick out to meet the staple, which would be bolted to the bed of the truck. Where the can is positioned now, the staple would bolt down into the main crossmember at the rear of the bed, which would be perfect. But now I’m second-guessing myself and wondering if the staple should be on the can and the hasp be hinged and bolted to the floor of the truck so the staple isn’t sticking up when the can isn’t in place. I’ll have to go out and stare at it some more before pulling out the drill. In the meantime I bought some seam sealer to close up the gaps my shitty welding blew through, and found some flat olive spray paint that almost matches the color of the can for the welded sections.

My next project will be to install some heat matting on the inside firewall to knock some of the temperature back out of the cabin. She runs very hot in the summertime, and any thermal protection I can get will be welcome. So I have to pull any vestigal insulation out from under the dash, clean up the firewall as best I can, and then cut and roll the insulation into place. I’d love to put it all the way down the transmission tunnel but I’ll likely never add carpeting to the truck and I don’t want it to get chewed up. We’ll see how well this works. I’m also going to throw a patch on the inside of each door to reduce the sound they make in the cabin and when the doors close.

Finally I’m thinking about seating position. I put the bikini top on last night and remembered that it touches my head when I’m sitting at a light. This is because The PT Cruiser seats are an inch or two higher than the stock buckets.

Going back down a little to the stock height is a possibility. I’ve got two spare steel seat bases in the garage that could be cut and welded to sit lower on the floor; I just need to figure out how I’d bend the metal cleanly inside the box. I toyed with the idea of buying/building a small metal brake of some kind, but then I thought about how two short pieces of angle iron bolted to a bench would give me exactly the results I need at a fraction of the cost.

Posted on   |     |   Leave a Comment on Updates and Small Projects  |  Posted in Progress

Wired

Due to circumstances beyond my control, I had most of the day to fart around when I should have been painting the house. So naturally I turned to the Scout and wiring the foglights. First I pulled the cowl cover off and drilled two holes to screw in the relays, then laid out the wires in their general pathways. The passenger side was relatively easy once the wires passed over the rat’s nest that are the bulkhead connectors. I routed the wire over the heater box, then under the washer tank and down the front of the fender to the lead for the light. The wire for the switch went up in through the two empty holes from the A/C hoses.  There was already a ground bolt connecting to the transmission case directly under that, so I took advantage of the situation.

The driver’s side was more difficult, because space is a little tighter on that side and I wanted to both piggyback on the existing positive battery cables and avoid the hot areas around the brake booster and power steering pump. So that wire and the positive lead go around the back of the firewall, duck behind the battery and down the front of the inner fender to the other light.

As much as I want to trim the wiring down to fit exactly right, I don’t want to tear the looms apart just yet, so I zip-tied the excess into bundles and tucked them out of the way on both sides. None of the wiring in the engine bay is pretty, but that’s a project I’ll gladly hand off to a pro shop to take on in a couple of years when the whole truck gets rewired.

Finally I broke out my Horror Freight dremel and started widening the choke hole to the left of the steering column to fit the switch. But my last $.05 steel grinding bit broke and then so did the chuck on the tool, so that whole thing will go in the trash until I can get back there for another one.

This evening I took the trash out and while the dog did her business in the backyard I tested them out in darkness. First I used the running lights, which are very nice for extra illumination pointed at the ground.

Then I tried the full setting.

Oh my god.

This is blindingly bright. Like, I’m going to need to take this to a flat area, aim it at the side of a building, and adjust the direction so I don’t cause accidents if I ever need to use these on the road. But, success!

Meanwhile, because I am a dork and a brainless tool of our capitalist system, I had to spend money on a six-pack of this coffee to try it out and to have a couple of the cans. Entirely too expensive, and I’m embarrassed to admit it. But I had had a couple of beers, and I thought it looked cool.


Posted on   |     |   Leave a Comment on Wired  |  Posted in Progress

Plans

I mailed off a check and an entry form for IH Nationals last week, and talking with Brian and Bennett, we’ve got a room reserved at the hotel in Ohio. Barring any major outbreak of COVID or zombie apocalypse, we’re definitely going to head west in August for the full event.

I spent a lot of time working on other things over the weekend but I did put a half an hour into planning out the wiring layout for the foglights. Because I am impatient, I hooked both leads up to the battery and flicked the switch—I didn’t realize this when I bought them, but the lights are actually dual-position: a small line of LEDs on the bottom work as running lights, and the other toggle is for the main bank of LEDs. They’re bright! I bought LEDs because the draw on the battery (and thus the alternator) is significantly less than incandescent Halogens and I’m happy with how they look.

As I mentioned earlier, the harness is set up in a way that assumes there’s space right next to the battery to mount the relays—which Scouts do not. The battery is up front, tucked next to the coolant overflow tank, and the rest of the driver’s inner fender is covered with stuff:

Clean 345

My plan is to lengthen the positive battery lead and mount the relays on the firewall. There’s a ground connection already available there, and the leads to the lights will drop down along the frame and up under the bumper. I sourced some 14AWG wire, clipped the connector off the harness, soldered the two together, and covered them in heatshrink tubing. I’m going to head back out and rough in the wiring to make sure everything works, and then I’ve got to figure out how to get the switch inside the cabin.

Also on the menu this year: a new battery tray. Having moved batteries around over the last couple of months, I was shocked to see just how lousy the tray looks (and how much has been chewed out of the inner fender).

Posted on   |     |   Leave a Comment on Plans  |  Posted in Progress

Lights and Wheels

The Scout ran fine over the weekend, although with the rain I really didn’t get the chance to drive her too much. I did mount the new fog lights on the bumper to start organizing the wiring under the hood. The way the harness is organized I can wire it directly into the hot/neutral leads in the battery, but the way they prewired everything the relays are right next to the battery leads and I have no place on the driver’s side of the fender well to mount them. What I’m going to have to do is start with the relay location in the middle of the firewall and lengthen the hot lead so that it wraps around the driver’s side fender and directly into the battery. Because I don’t give a shit about my purple dashboard (I have two spares in the garage) I’m going to open up the vestigal manual choke hole to the left of the steering column and make that the switch mounting point.

I also started looking at pulling the steering wheel off the spare column I brought back from Flintstone. The first order of business was to get it mounted to something so that it was attached to the bench, which was pretty easy. Then I put two bolts into the wheel, mounted the cheapo puller I got at Carlisle and started cranking down on it, but when I was faced with a lot of resistance I backed off  to double-check my bolts and reconsider the puller. It’s not anything pressing, and I’d like to save as much of the column as I can, so I’m going to resist the temptation to break everything to get it apart and take my time.

Posted on   |     |   Leave a Comment on Lights and Wheels  |  Posted in Progress

Power Up

DSCF9028

I’ve let the Scout sit since Sunday with the battery connected, figuring four days would be enough time for a parasitic leak to drain the battery as it did last time. To recap: New battery, new starter, new negative battery cable. With fingers crossed, I went out and turned the key today at lunchtime: she turned over immediately. So I’ll do some short trips and keep an eye on the ammeter—but I think I’m calling this fixed.

Posted on   |     |   Leave a Comment on Power Up  |  Posted in Progress

Bumped

So the good news: the bumper is on! I shot it with a can of etching primer and then a final coat of heavy implement black, and it looks great! The whole front of the truck looks much better now. The license plate looks great in place. Overall I’m stoked with how this worked out.

The problem is that sometime between Tuesday and today, she developed a starting issue. I got absolutely nothing from the starter at first, so I checked the battery with a multimeter, which was giving me a little more than 12 volts. After looking over all the wiring and finding no breaks, I pulled the Accord in and was able to jump the engine with some difficulty—lots of chattering from the starter and then some slow cranking. I let it run in the driveway for the 15 minutes it took to swap bumpers, shut it down, and was rewarded with chattering again. I was meeting Brian in Annapolis for dinner, and, disappointed I couldn’t take the Scout, I set it up on the trickle charger and left. When I got home, nothing had changed.

Tomorrow I’m going to have Jen help me test the leads on the starter, clean them off, and see if that does anything. If that’s no good, I’ll take the battery back to AutoZone and have them replace it for a new one under warranty. And if that doesn’t work… I’m not entirely sure what to do after that.

Posted on   |     |   Leave a Comment on Bumped  |  Posted in Bumper