

Here’s Day 3 of the EV swap project. This video covers removal of the 196 engine out of Slowflake, where we took the whole thing out as a unit, pulled the transmission off, and hoisted that back up into place on the truck. I did spend another two days with Brian this week on the project, so now I’m only three videos behind.

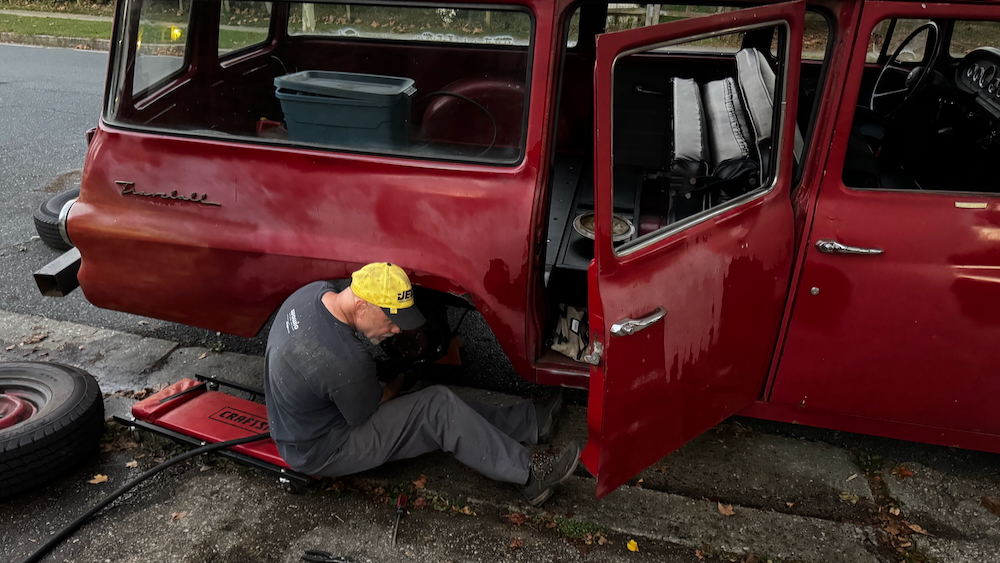
Looking at this photo, I have decided two things: first, I need to clean and rattle can spray the driver’s door to match the passenger door. Second, I’m going to paint all of the wheels white.
Here’s a video update from the past couple of weeks.
This covers the timing, rehanging the two front doors, working on Bennett’s pickup and saying goodbye to Mr. Hanky, and a 40-mile round trip in Darth Haul divided by a stop in his driveway to diagnose and free up the brake system.
Here’s the second day of the EV swap project. It’s taking a lot of time to go through the footage, but I’m making headway. It doesn’t help that I’ve got another pile of footage of the Travelall from the last week to go through again.
It appears I never posted the first video here, so I’ll fix that right now.
Well, this weekend was a journey. Mostly a good one; a lot of good stuff got accomplished, and I spent a bunch of time with friends, but it wasn’t without its challenges.
We had a workday scheduled at Brian’s place in the country to work on Heavy D, Bennett’s long-sidelined pickup waiting for welding repairs, a windshield install, and re-assembly of the front clip. The last time I was out there I’d bent and formed a complicated section of metal to weld to the front of the firewall but Brian’s commercial welder was too strong to work the sheet metal without blowing through it. We were also going to help Brian move his pickup around and place the bed on the frame to free up space, and see what other stuff we could get up to.
My plan was to drive Darth Haul out there for her first short-distance trip, so I worked on the engine timing and fuel system on Thursday. I was having issues with the fuel pump pulling debris from the saddle tank up into the pickup and clogging it, so I rigged the boat tank up with a length of hose and put it on the passenger floor. After loading up my tools, welder, and welding bin, I hit the road at about 9 and took my time getting out there. Brian’s place is about 20 miles away, and I took back roads to avoid any high-speed sections. The truck did very well! Shifting is smooth, the engine is strong, and the brakes worked well. I noticed a vibration at 40mph and heard some rubbing in back, which foreshadowed later events.

At Brian’s house, I helped he and Bennett to clean out Mr. Hanky, because our friends Chad and Liz were coming down from Pittsburgh to possibly buy it. Bennett has had it up for sale since Nats in order to free up cash and space for a cleaner Scout, and they’ve been in the market for another project for a while. They arrived at 11 and he showed Chad the truck while we caught up with Liz. By 1PM the deal was done, and we helped them load the trucks up with a pile of extra parts. It was bittersweet to see Hanky drive away, but it’s great to see him going to a good home—it reminds me so much of selling Chewbacca to Carolyn to give to Brian—I know they’re going to do a great job reviving him.

After moving Brian’s pickup and freeing up a bunch of floor space, we had pizza delivered for a late lunch and then set to work on Heavy D. The first big task was to re-install the windshield, and luckily the rubber was designed exactly like what I put in Peer Pressure, so I knew how to align it in the channel. Between the four of us and with judicious use of glass cleaner, we got it in place and then used plastic putty spreaders to guide the edges into the channels, then fold the locking flap over.
With that done, I set my welder up and put the patch in place, ground it down, and got it ready for paint while Brian and Bennett started hanging fenders. Within about an hour we had the truck put mostly back together and ready for a test fire. The carb was mad at being ignored for a year, and didn’t want to run properly, so Bennett will have to go back and diagnose that. By 5PM we wound down and set course for home. I took Bennett back to his place, but noticed the truck working harder as we drove. Stopping for gas I found all four wheels hot to the touch, which told us the brakes were dragging. By the time we got to his house the passenger rear was smoking slightly. We pulled the wheels off and cooled them down with a hose, then banged the drums off with a hammer. The pads were all the way extended, which meant that the system wasn’t releasing pressure. It was getting dark, so he gave me the keys to his CR-V and I drove that home after parking Darth in his driveway.
The next morning I got there at 9 with all of my brake tools and fluids, and we started troubleshooting the system. After tearing apart and rebuilding the rear drums three times, we tested the master cylinder upstream and verified it wasn’t the lines above either axle. So we disconnected and bench bled the master until it looked clear, then connected everything back up to test. It looked like the brakes were grabbing and releasing, and a test drive verified this. While under the truck I also noticed a huge dent in the driveshaft, which explains the vibrations above 40MPH.

I packed up my tools, extended my sincere gratitude for Bennett’s knowledge and time, and set course for home. She ran well and didn’t feel like she was struggling the farther we went. The brakes and clutch felt good, and I got her home with no problems. The wheels were hot when I checked them after parking it, but not scalding as they had been before. It may take another bench bleed to really kick the issue, but for now, I’m happy she’s back in the driveway.

I got Darth Haul running well enough to take her down the street for a pizza and beer run. I’m having a little issue pulling gas from the tank, and after a little roadside troubleshooting I believe there’s something in the tank clogging the pickup. I’m planning on driving her 12 miles out and back to Brian’s place on Saturday, so I’m going to take the boat tank and a length of fuel line with me for backup.
I did get some more of the tasks checked off the master list:
The temperature sender from the green truck did in fact work—I heated it with a heat gun and then hooked up the wire and grounded it, and it tested properly. So I pulled the sender from the Sniper kit out and swapped this one in. Good to have another working gauge!
The passenger door hinge got swapped out, the door adjusted, and now the door closes correctly for the first time since I bought this truck. I had to get a bolt to put in one hole because it was stripped, but it went successfully. While the doors were broken down, I did clean them out, swab them with Rust Converter, and spray on a layer of rattlecan IH Red. And at the same time, with some fresh H-F wire wheels, I cleaned off the drip rails, masked them off, and used that same rattlecan to cover them in red up to and on top of the edge.
Finally, I dragged all of the timing tools out, plugged the proper vacuum hoses, and attempted to dial the timing in again. It seemed like every adjustment I made retarded the timing even more than before: reducing the air/fuel mixture while adjusting the dwell, all the while keeping an eye on the timing and vacuum. It’s running OK now, although the idle is still high, but it’s not dieseling anymore at shutoff, which is nice. I’m hoping I can get the heads at Brian’s to help me work on it a little more.
I crossed a couple of things off the list on the Travelall while I had good weather and a clear schedule:
So next up on the list:
If I can keep ironing out the problems, my goal is to drive it 12 miles to Brian’s house this weekend for a workday. We’ll see.
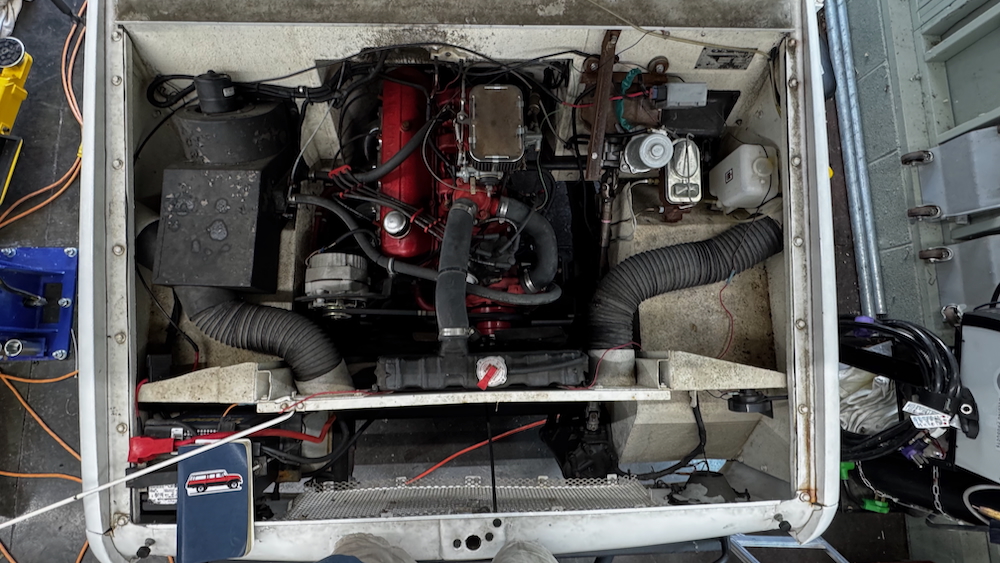
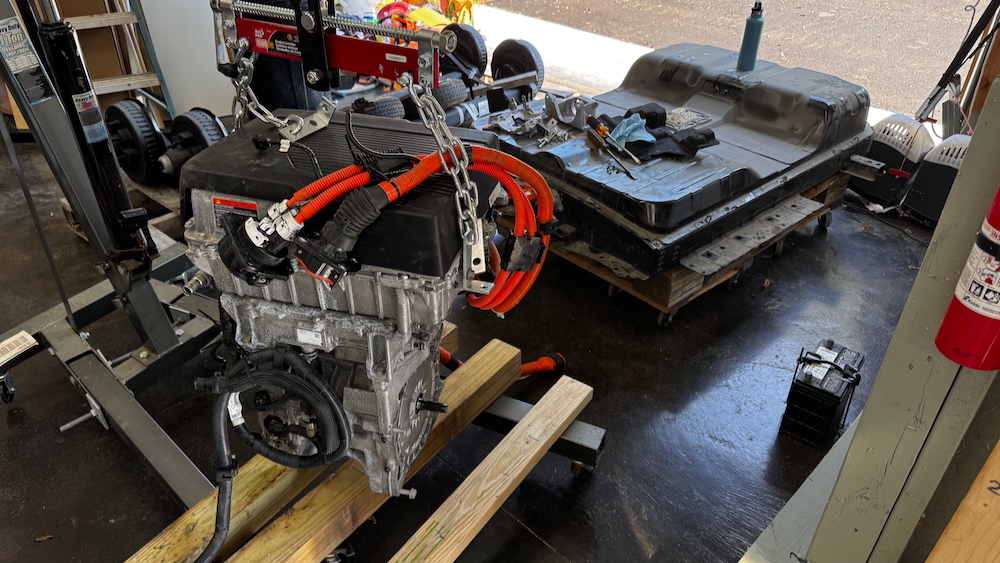
I’m back at home after working on Brian’s EV project. We put in four solid 10 hour days, pulling the battery pack and power pack out of a Nissan Leaf and then pulling the front clip and 196 four-cylinder engine out of Slowflake, his Scout 800. Getting the major assemblies out of the Leaf was much easier than we both were expecting, apart from not having enough 18 mm wrenches. Working on an EV with only 36,000 miles means all of the bolts came out easily and there was no grease covering every surface. The Scout, on the other hand, was a different story. Slowflake is 100 times cleaner than Peer Pressure, being a relatively recent restomod, but the transfer case was leaking and the transmission was slick with a coating of dirt and oil.

This marks the first time I’ve taken an engine out without the help of veterans, so we were learning as we went. Originally thinking we would split the transmission from the engine and just pull that out, we quickly realized those bolts were inaccessible, and we would have to pull everything out as one unit. That meant we had to get very creative with the cherry picker to lift up and angle the engine under the transmission hump and over the front bumper to remove it.
This process took the better part of a day, and it seemed like every time we thought we’d disconnected all the wires we found one more that had to be removed. But on the evening of the second day, we had the engine out and sitting on some blocks of wood, waiting for the transmission to be split.
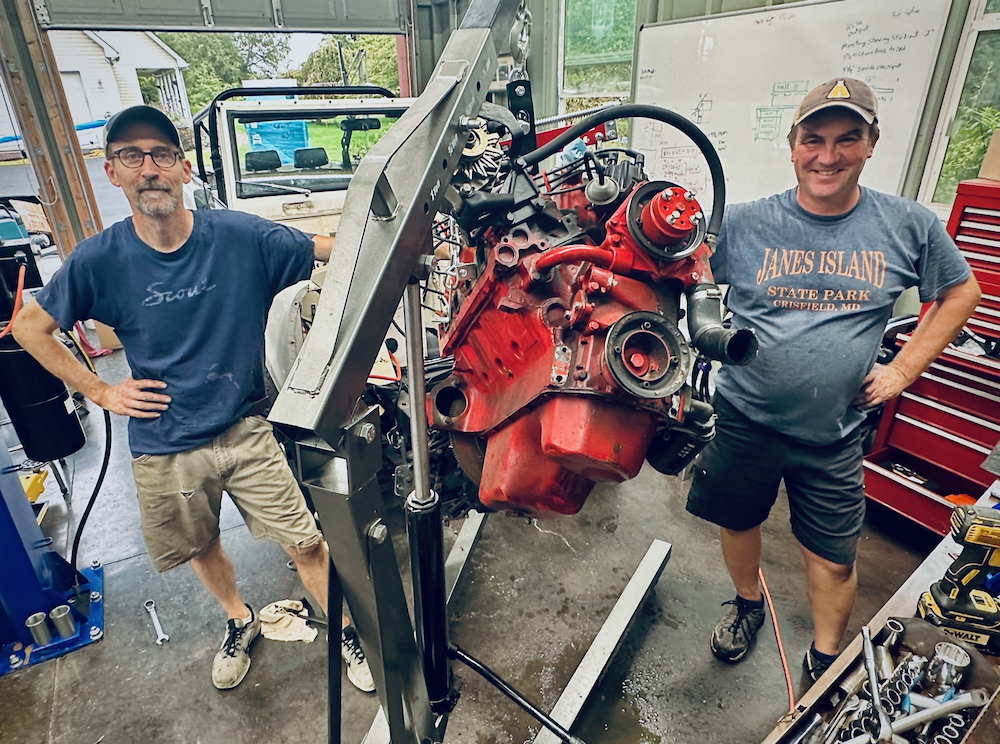
The third day started with separating the two and putting the truck back up on a lift to get the transmission reinstalled. That took some doing; we had to get it up off the ground and onto the transmission hoist, which was taller than the cherry picker’s reach. We looked around and Brian said, “why don’t we just use the lift?” Genius. We chained it to the lift and got it onto the hoist, then muscled it into place under the truck. With the crossmember reinstalled it still wanted to fall out, so we steadied it with a block of wood and hooked the rear driveshaft back up.
On the fourth day, we started with something easy and installed a rear disc brake kit Brian had purchased at Nats five years ago. This took two middle-aged men a couple of hours and a lot of head-scratching while we tried to follow lousy directions, but common sense and mechanical aptitude prevailed and we got everything hooked up—and we didn’t have to flare a single brake line, which was some kind of minor miracle. (Looking at this kit gives me an itch to buy and install the front kit on Darth).
Then we got the EV power pack back on the cherry picker and hoisted it into the Scout engine bay to look at the fitment. There’s plenty of room in there—enough that we could probably fit a stack of batteries in front of the motor, if we run out of space in other places.
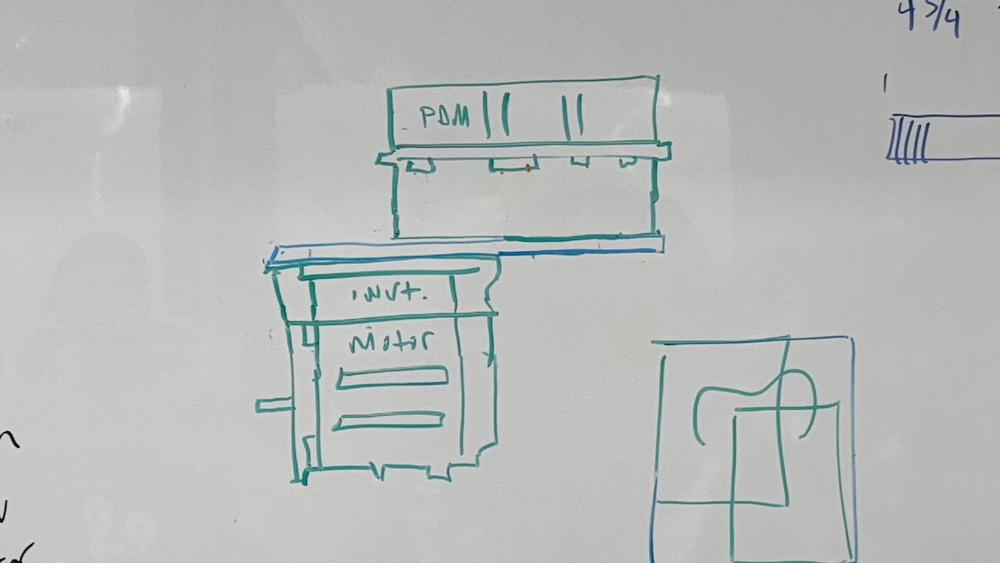
We were running out of things we could tackle without input from the guy who built the replacement wire harness, which is the first part of the puzzle that needs to be solved. The next thing that we need to do is hook the battery pack up to the power unit to test them both outside the car and verify everything works. Then we separate the brain at the top of the power pack from the inverter/engine combo and have an aluminum plate laser-cut to offset the two so that it fits in the engine bay.
We also need to talk to the guy who manufactures the adapter for the EV engine to the original transmission to see how close they need to be.
After that, we have to crack open the battery pack to see what sizes the individual battery elements are and how many are in there, then figure out where we can tuck them into the nooks and crannies in the Scout. Then we fabricate some aluminum cradle/boxes (thus practicing our TIG welding) for each group, and figure out how to wire them up together.
I set up cameras everywhere and wound up having a ton of footage (338GB) to wade through for YouTube. I’m going to split each day up into its own individual video because Monday’s video timed out at 40 minutes.
I’ve been looking forward to this project for months now, ever since Brian dreamed it up, and it was exactly what I needed to clear my head during this sabbatical. Four solid days of hanging out with my friend, getting our hands dirty, solving problems, and coming up with solutions felt great. I was happy that the skills I’ve learned in the last three years working on Darth Haul have come in so clutch. It feels good to learn and grow and tackle new things that would have been inconceivable five years ago.
Here’s the latest video with details on the carb, fuel pump, window replacement, and rear bed floor prep.