I had a bunch of time on Labor Day to fart around, and after a leisurely start in the morning, I got to work on the windshield project. The first part was sanding the chassis encapsulator drips off and prepping the surfaces for primer. I started with the back and worked my way over to the front, polishing everything with 1000 grit sanding blocks. After the majority was covered I used seam sealer on the top and sides, closing up the areas where pinch welds were all that IH used, and let that sit.

The next big question, based on the plan, was: how easy is it to swap out windshield frames? I’d pulled a whole frame off a truck back in 1999 or so, humorously enough right up the road at West End International, but I don’t remember how easy or hard that was twenty-plus years later.
The frames are built with two braces on each side. The braces mount to the top of the cowl with two bolts and a third on the passenger side to adjust up or down. The A-pillars are built with access panels to reach each of these bolts, but it’s a lot easier to see and adjust things when you can reach them, and for that I figured the fenders might have to come off. I’ve never had the fenders off this truck or Chewbacca—I’ve probably pulled ten different fenders off of other Scouts in the past, but not the two I actually own. I had no idea what to expect. There are somewhere between twenty to twenty five bolts that hold each fender in place, and all it takes is one frozen bolt to ruin an afternoon. Knowing that I was probably doomed at the beginning, I got the impact driver out and started working. And to my shock and surprise, all of them came out with little to no problem.

Actually getting the fender off took a little doing—the space between the door and fender is small—but when I figured that out I could see what I was dealing with. The well at the bottom below the kick vent was full of twigs and leaves; I’ll have to vacuum the other side later this fall. Somebody had gotten in here and hit everything with POR-15 or some other encapsulator, because it’s all in excellent shape. The inner fender is relatively solid except for some rusty spots in the front corner, so I’ll have to repeat this process and hit it with encapsulator.

What I found was that I can’t really see much of the bolts or their mounts from the front side, and there isn’t much gained by pulling the fender at all. The only advantage would be to hit the back sides of the bolts with PBBlaster, something I forgot to do before I rehung the fender.
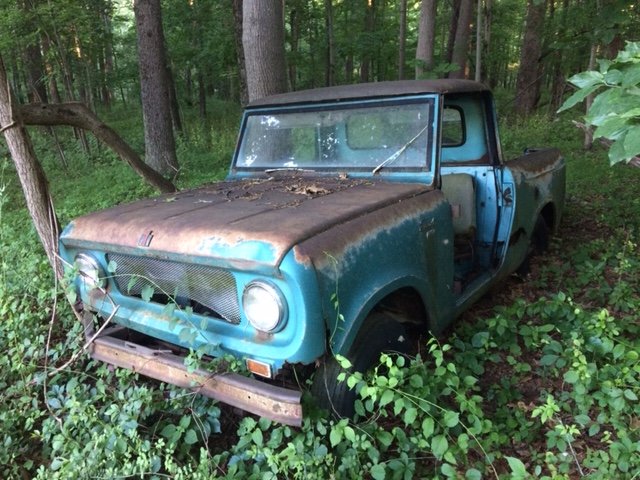
I did, however, spend time doing something completely useless: I pulled two of the spares off the wall in the garage and hung them on the outside of the truck for shits and giggles.


Oddly, I’m not that upset with how the white fender looks! I don’t think I’d ever paint this truck white, but it’s got an interesting appeal. I wonder if my opinion would change if I hung one of the red doors on it instead of the purple.
It was due to rain in the afternoon, so I got things put back together quickly, finished sanding the windshield frame, and put everything back into the garage. I decided I’d stick with the current paint theme and keep the new frame red, so the color I chose is Chrysler Flame Red, which is close enough to what I’ve already got.
After Amazon dropped off the paint, I sanded the frame once more, wiped it with a tack cloth, and prepped it for paint. I was thinking Flame Red was going to be light and bright, like IH Red, but it appears to be a lot brighter than I was bargaining for. After one coat from the Duplicolor and some quick sanding, here’s how things stood:

I’m considering covering this with International Red, which has more blue and isn’t quite as bright. I’ve got a can of Ace implement paint, basically made for covering scars on farm equipment, and I’m thinking I’ll sand the Flame Red smooth and put a couple of coats of this on it, because I like the color much better.